
Welcome to Another Travel Hacks Friday. As part of a new series, every Friday, we will be introducing new travel hacks for outdoor and urban adventures. We will scour the web for the best and most practical hacks, as well as dig into our reserves and share our own awesome moments of ingenuity!
Paracord is such an amazing and useful piece of gear, that in order to do it justice, I’m going to split this hack into 3 parts.
For those who’ve ever needed to hang a bear bag, or rig a safety line, you know dental floss just isn’t going to cut it. Rope, or some form of it, is an underrated item often overlooked by travelers aiming to be lean and mean! Unfortunately it’s also one of those items we never realize we need, until we need it.
I don’t blame you though, if my choice were between carrying a backpack or 50lbs of rope, the backpacks going to win out every time. For the ultimate outdoor survivalist, you could learn to make rope out of plant fibers, but this is time consuming, and in most cases a last resort.
A better, and far easier, solution would be to go and get you some paracord.
I’m talking about lightweight, high tensile strength paracord, also called parachute cord, utility cord or 550 cord. The same type of cord used to suspend parachutes. Paracords have been used amongst the military for some time now, and is fast becoming standard issue amongst campers and outdoor survivalist for its strength and versatility. Even for backpackers and casual travelers paracord has a plethora of uses and not just for survival situations.
A kernmantle rope made of braided Nylon or Polyester sheathing, and a high number of interwoven strands within (also known as the “guts”) paracords are strong, small and super lightweight. The cord inherently has a high-tensile strength of 550lbs (hence the name). The polyester versions are essentially the same, and sometimes have an even higher tensile strength.
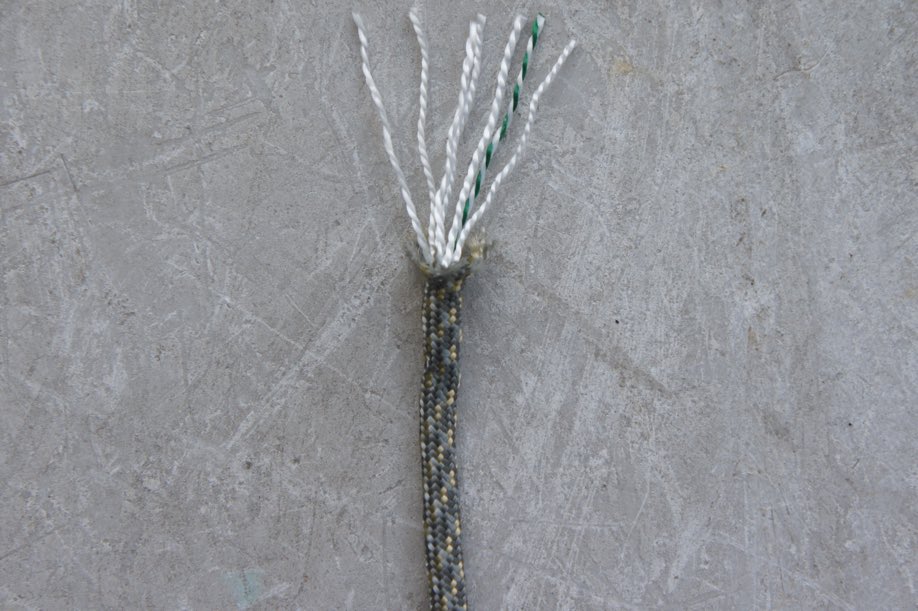
Like conventional ropes, paracords can secure, lash, pull, lift, and strap, but unlike standard ropes, paracords can be further stripped down and its fibers inside be further used for gear repairs, fishing lines and yes, even dental floss.
Best of all, paracord can be styled into wearable accessories like belts or bracelets, so you needn’t sacrifice precious bag real estate. Seriously, your friends will be green with envy.
For the first part of this weeks hack, I’m going to show you how to make a paracord belt.
How to make a Paracord Belt
Materials/Equipment
- Buckle
- Paracord 550 (length will depend on waist size. I recommend 50ft minimum)
- Lighter, scissors
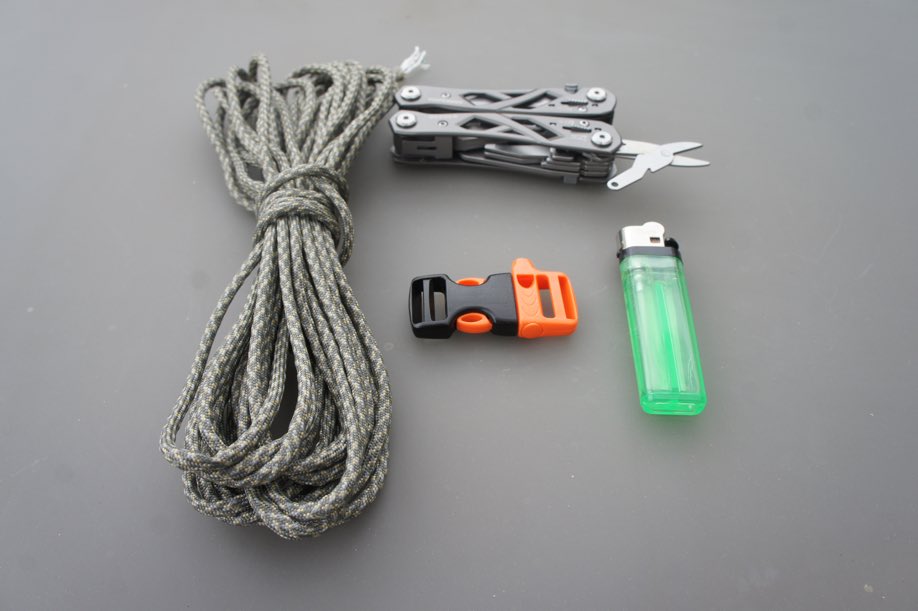
We opted for the buckle whistle from REI, but there are a variety of buckles available depending on personal preference. Also, the length of paracord needed will depend on your waist size. To give you an idea, for every 1 foot of paracord, you’ll get approximately 0.64 inches.
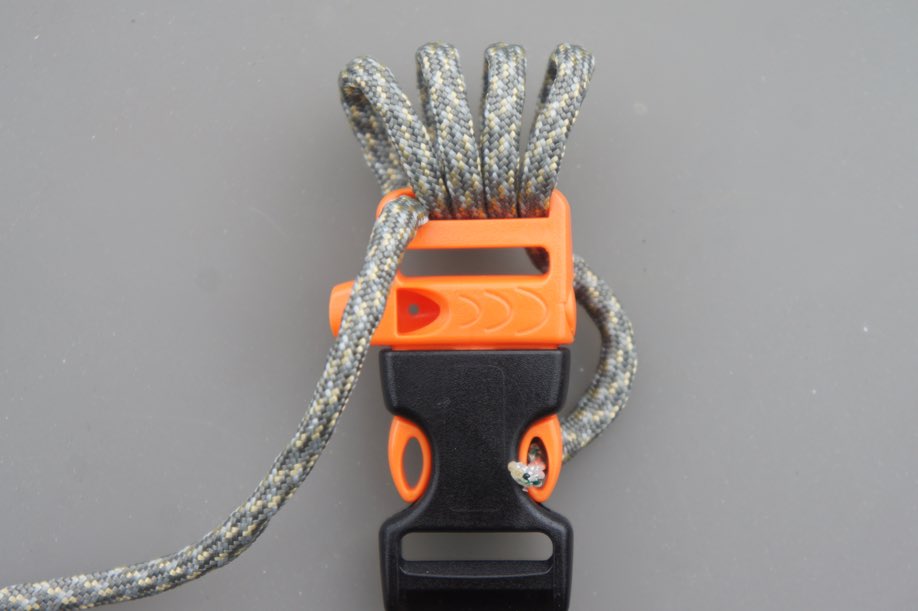
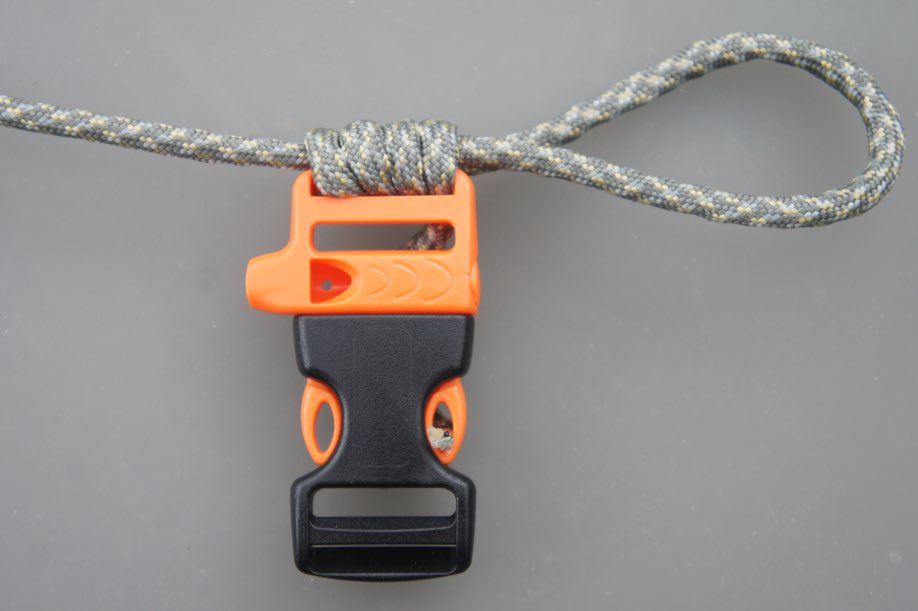
1. Cut to length and seal the cut end(s) of the paracord by burning with a lighter to stop the fraying
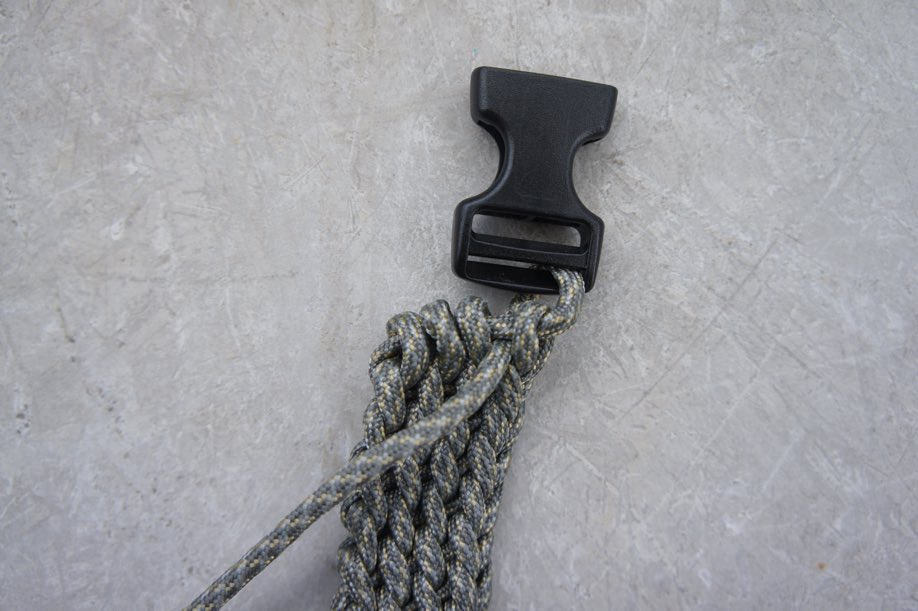
2. From left to right, thread the paracord through the buckle creating 4 loops going under over and fasten the end of the cord to the buckle to keep it from unraveling
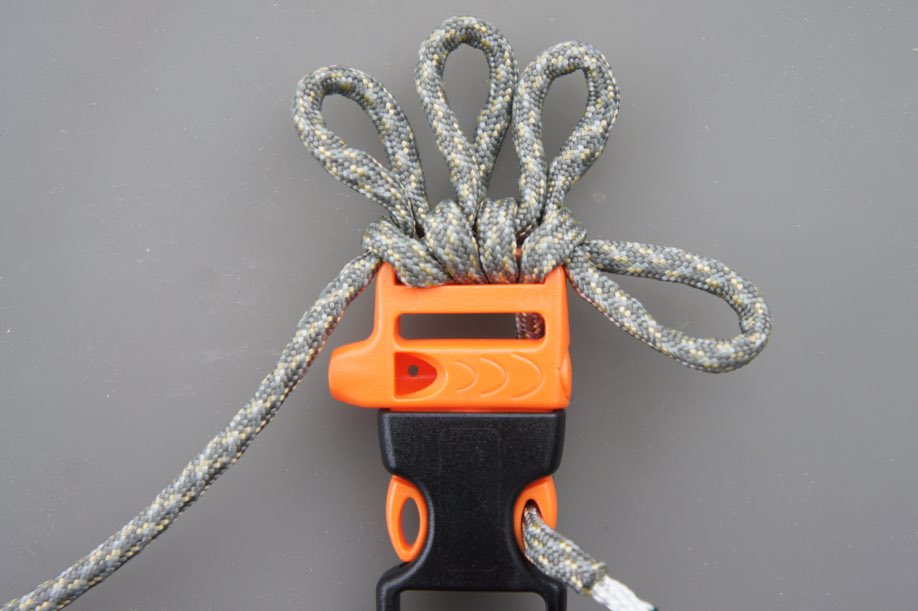
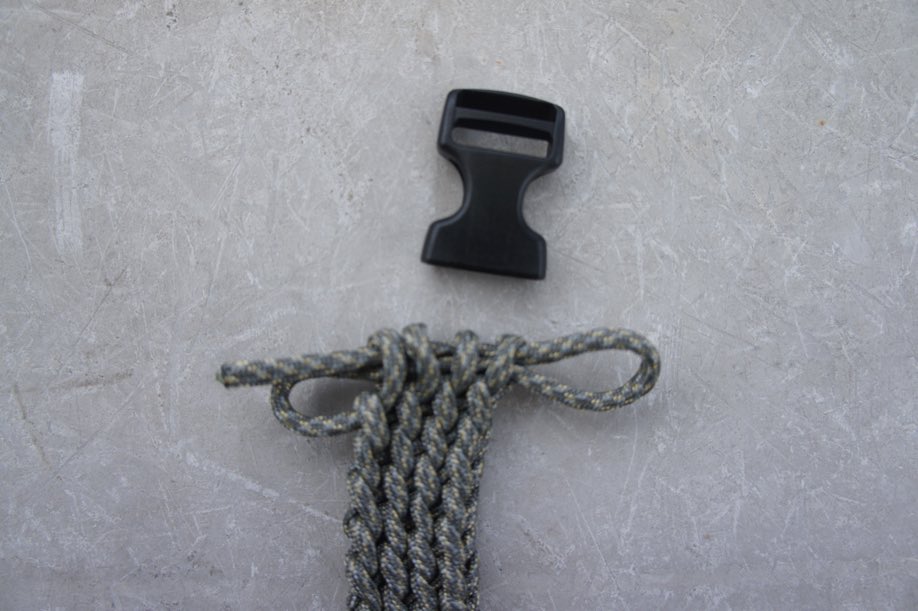
3. Form a loop with the trailing end and thread it through the 4 loops from step 1, leaving a couple edges hanging off the right end


4. Tighten the 4 loops from right to left
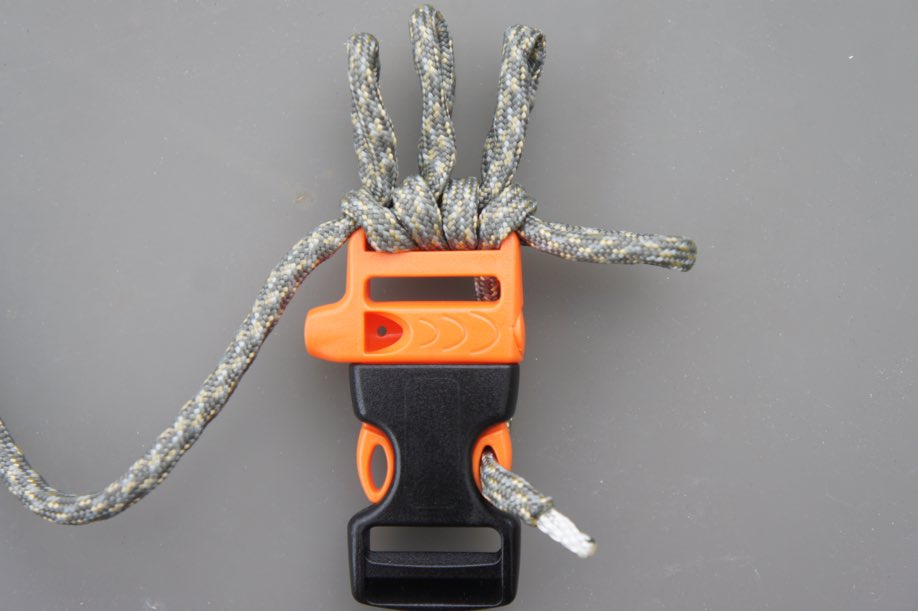
5. Slightly spread apart the 4 tighten loops just enough to pull out the tail end of the cord you thread through in step 3 to form 4 more loops
6. Turn the loops counterclockwise so the left of the loop is facing you
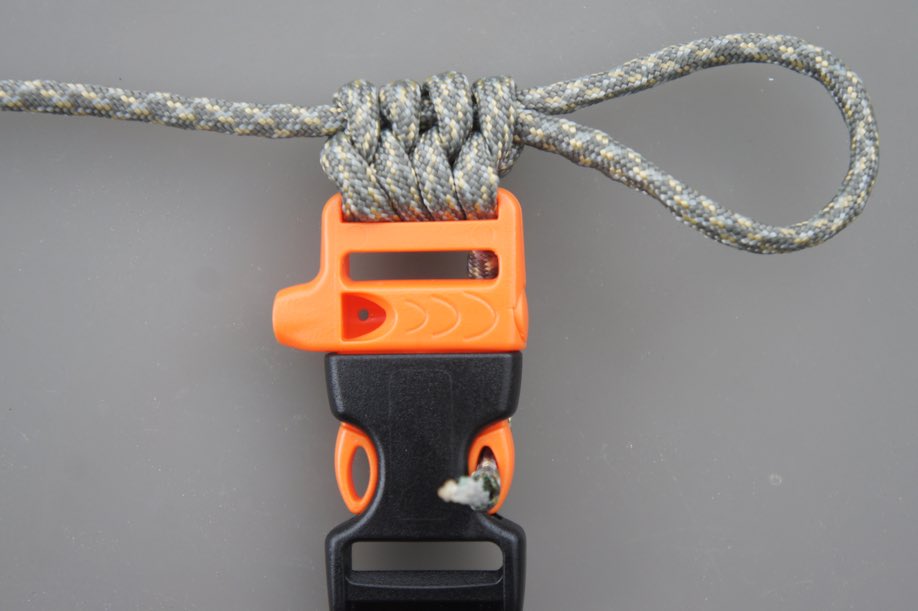
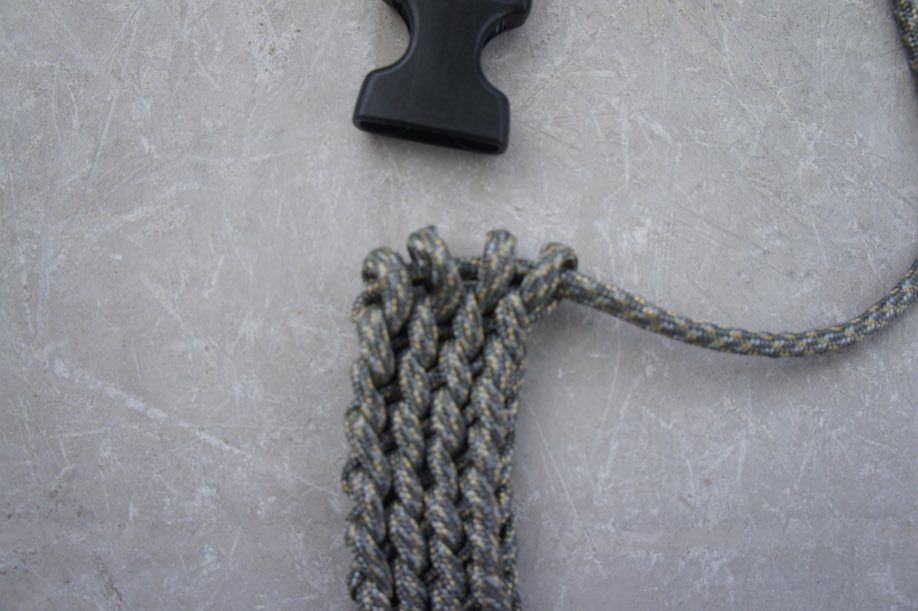
7. Form a loop with the trailing end again and thread through the 4 new loops, leaving a couple inches hanging off the right end like step 3
8. Tighten from right to left again, pulling on the loop hanging off the right end to tighten the last loop on the left (if your loop on the right becomes too long, just pull on the trail end of the paracord to the desired size)
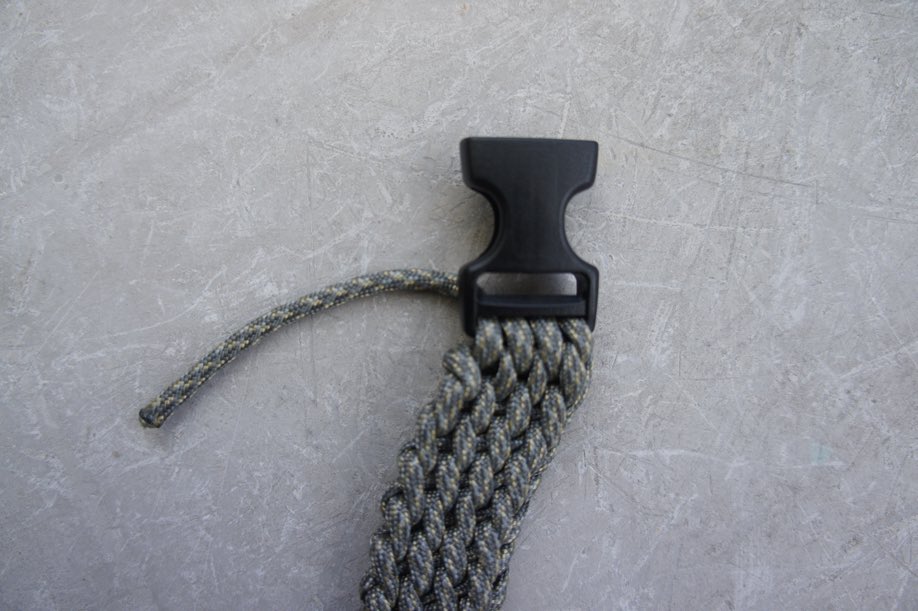
9. Rinse and Repeat until you get to your desired belt length.
10.Once you’ve reached your desired length, grab the buckle end (make sure it’s facing the right way so it can clip to the other side)
11. Pull the hoop hanging off on the right, until the trailing end comes through all the way through
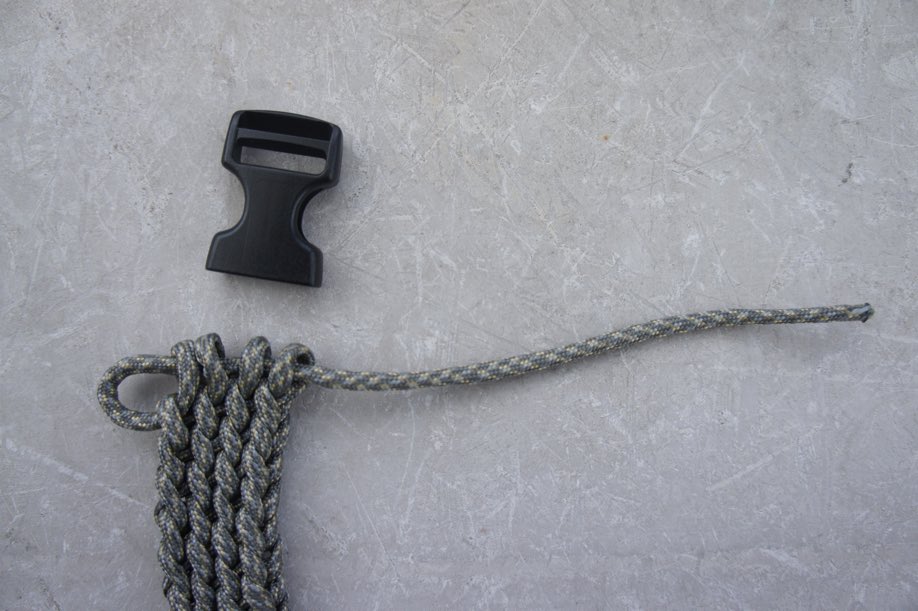
12. Slightly spread apart the 4 loops
13. Loop the trailing end of the paracord to the buckle end, over under
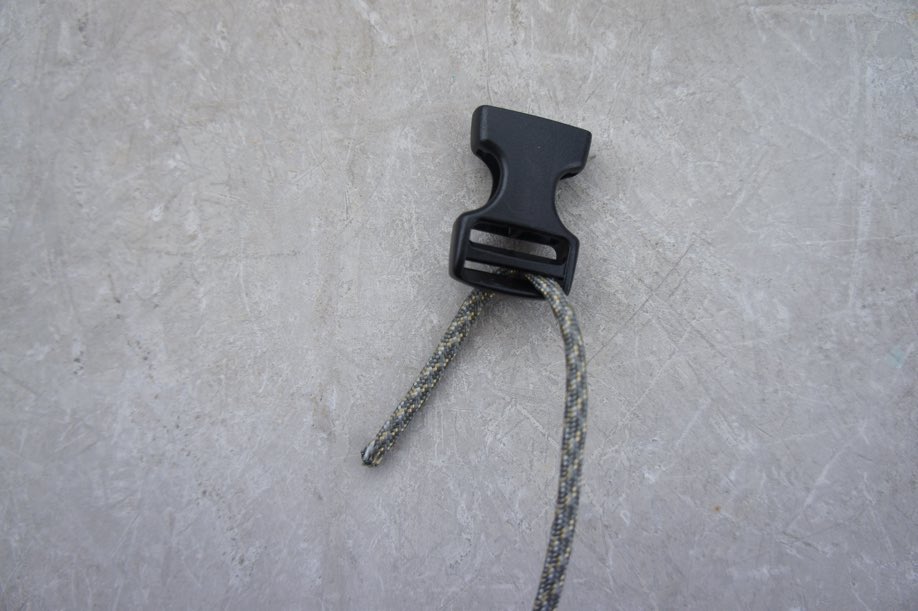
14. Thread the trailing end through the first loop on the right and then back over through the buckle
15. Repeat until threaded through all 4 loops,
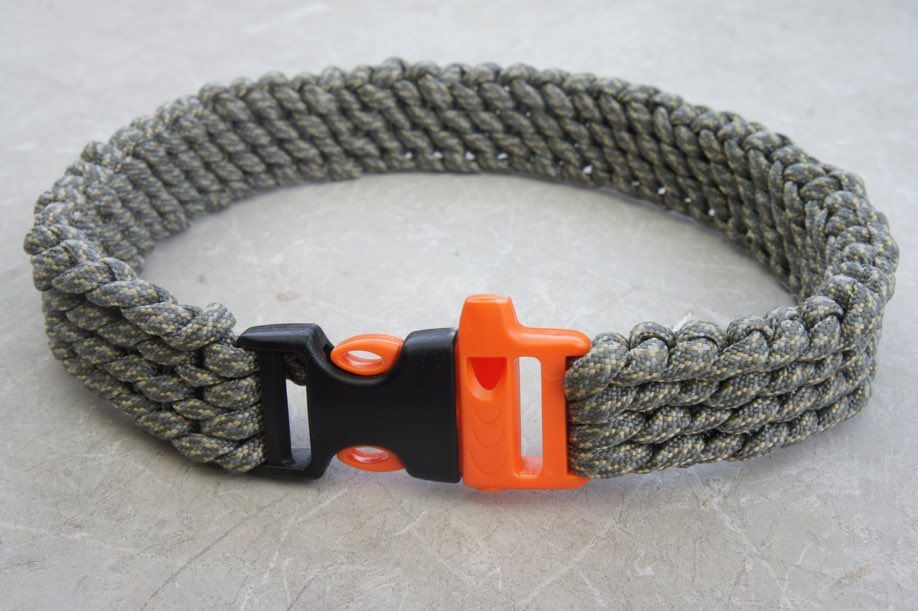
16. Tie off the end in a simple knot. Alternatively, you can thread it through anywhere in the belt, cut the excess and seal the frayed end with a lighter.
17. Now admire your new Fashion Accessory – The Paracord Belt!
If you want to increase the length of cord used to make your paracord belt, or need a larger, or even smaller waist size, you can change the number of loops per row. So instead of using 4 loops like this tutorial, 3 loops would make the belt longer and thinner, whereas 5 loops will make the belt shorter and wider.
Lastly, to unwind, simply undo the buckle end you just completed, and pull the trailing end back through the loops to the left, and pull. That’s it.
Read my post next week to learn how to craft a Paracord Bracelet.
Carey
Latest posts by Carey (see all)
- Travel Hack Friday: #DIY Orange Peel Oil Candle #travelhacks - October 16, 2015
- Hanoi Vietnam, The Photoscape! #Hanoi #Vietnam #Southeastasia - October 5, 2015
- Travel Hack Friday: How to Find Edible Bugs - October 2, 2015


Carey this is super clever! I feel like McGuyver now
Ryan
Ryan Biddulph recently posted…Blogging from Paradise Podcast Episode 2: Challenging Your Limiting Beliefs with Kelli Cooper
I know! Me too! I’m about to make paracord belts a staple for everyday wear
You can do so much with paracord! Have you seen the paracord flip flops?
Evan recently posted…Paracord: Projects & Uses – Posts of the Week Wednesday